Introduction
The following methodology guide sections are presented:
First of all, define the type of project:
- Text classification (what is text classification?)
- Entity detection (what is entity detection?)
- Both text classification and entity detection
In the latter case, create two separate projects and combine the outcomes in a pipeline: one project can use a model from another project.
Although it is possible to create multilingual projects, it is recommended to create one project for each language to obtain the best possible results. In this case, the language of the documents needs to be defined.
Text classification
Step 1: Initiate the project
- Create the project (type=Text classification)
- Upload documents
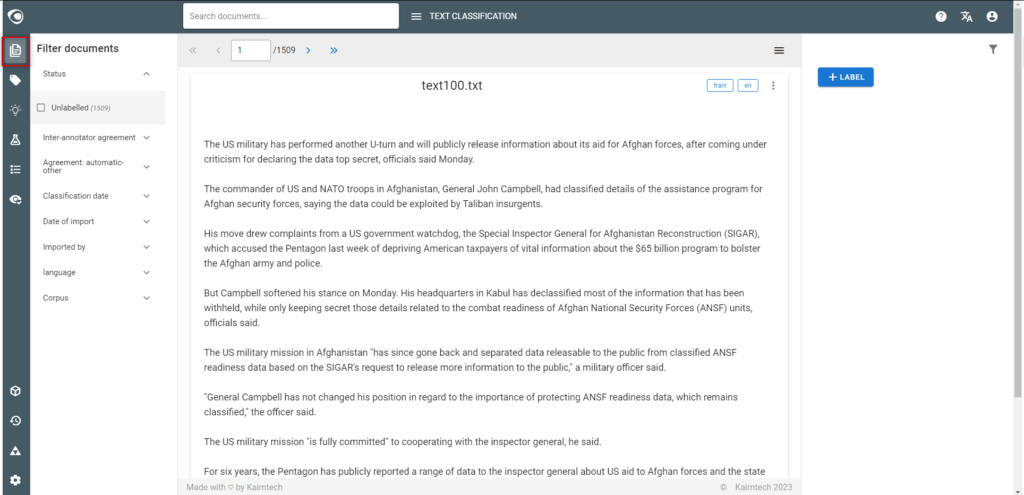
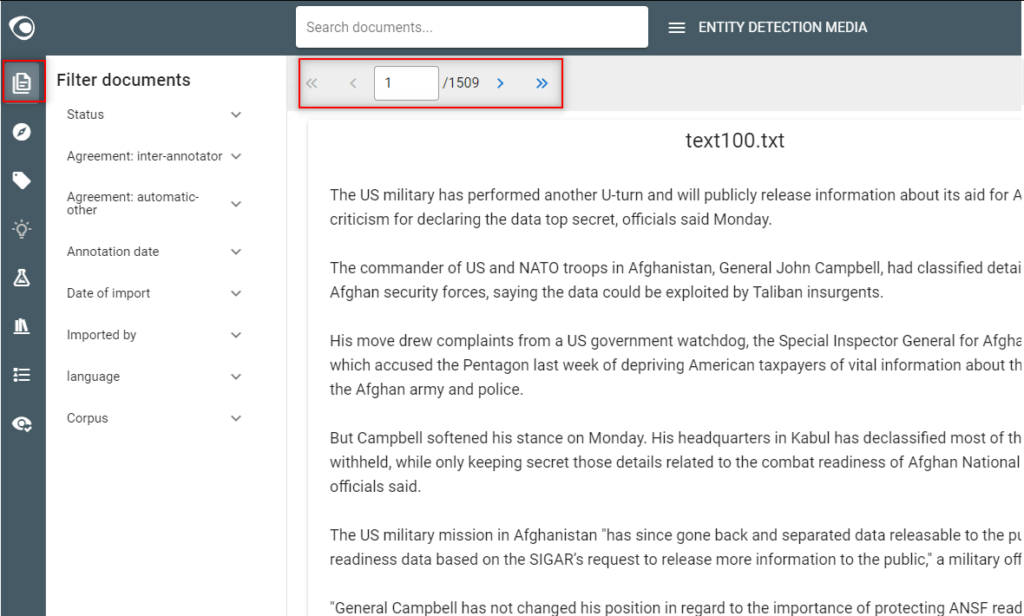
- Go to the Documents view
- Inspect documents to see what they look like, and explore differences
Step 2: Define labels
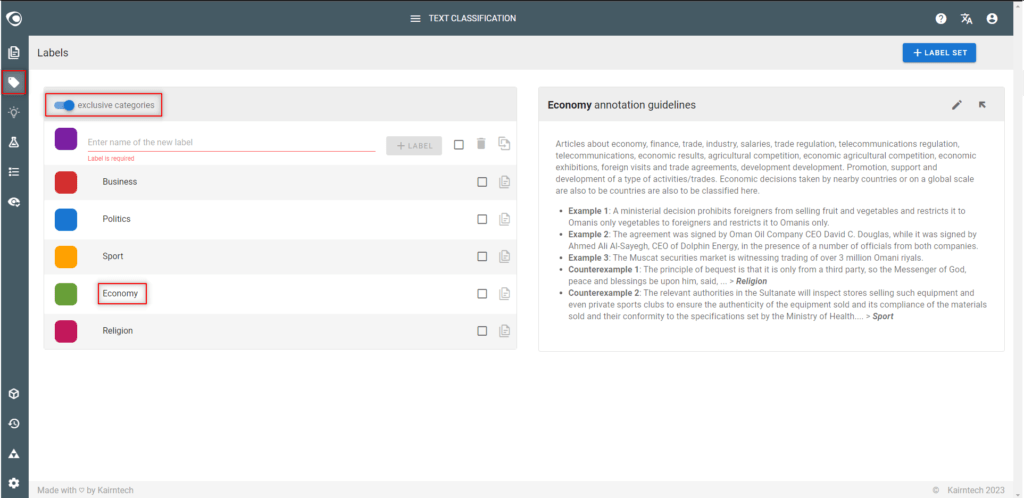
- Go to the Labels view
- Create labels
- One label = one category
- Think whether a document could belong to one or several categories
- It is possible to create a label to obtain better results even if the label is not used to create a classification model
- Write annotation guidelines for each label (recommended)
Step 3: Pre-annotate documents (optional)
- Why using automatic pre annotation?
- Pre-annotation with an off-the-shelf model or NLP pipeline saves time because a first version of the training dataset is created automatically
- Pre-annotate documents
- At least some of the labels (categories) of the existing model/NLP pipeline should perfectly match the labels you want to create
- Pre-annotate a small number of documents (say 50) to start with, because you all annotations need to be reviewed individually in order to create a high quality dataset
- Select “Labelled” in the filter “Status“ to access the dataset
- Please note:
- The dataset consists of all labelled documents
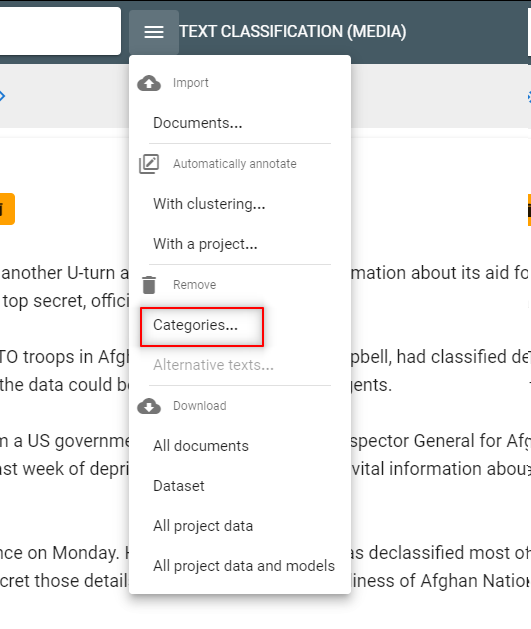
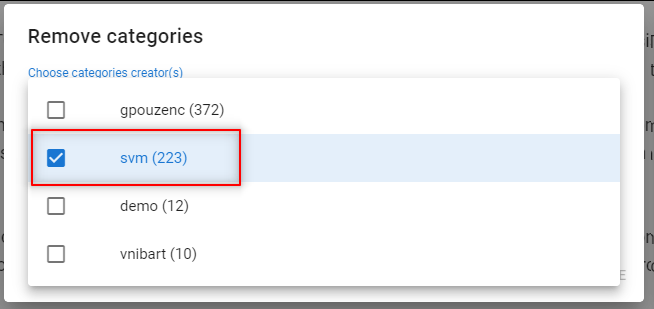
- Useless labels (categories) can be deleted together with their annotations in the Labels view
- When creating new labels, review all the annotated documents to complete any missing annotations (only for multi-category projects)
Step 4: Annotate documents
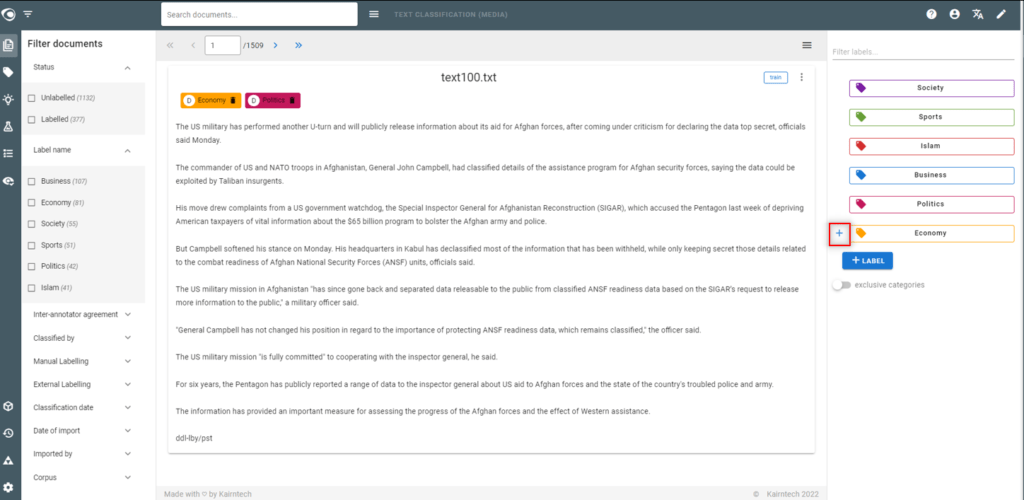
- Annotate at the document level
- Single or multiple categories
- At least 10 to 15 annotations per label (category), following the annotation guidelines
- Continue even after the first appearance of the blue “pop up“ announcing that suggestions are available
Step 5: Use the suggestion engine
- Why using the suggestion engine?
- To speed up the dataset creation
- To quickly assess the machine’s ability to learn
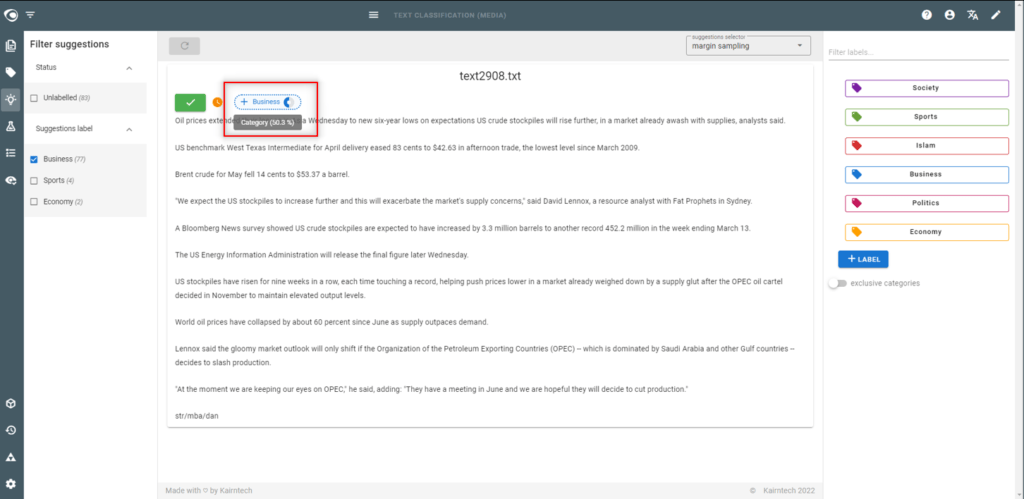
- Go to the Suggestions view
- Accept/correct the suggested categories then validate the document. It will be added to the dataset with its categorie(s).
- Manage suggestions
- Sort them according to their confidence level score
- Filter the list on the label (category) you want to work on
- Please note:
- The suggestion engine is updated after a few validated suggestions
- The suggestion engine is based on a machine learning algorithm with a fast training time (but which will not necessarily provide the best results)
Step 6: Review the dataset
- Why reviewing the dataset?
- Dataset quality is essential to create the best possible model
- Go to the Labels view
- Make sure the annotations are evenly distributed over the labels … as much as possible

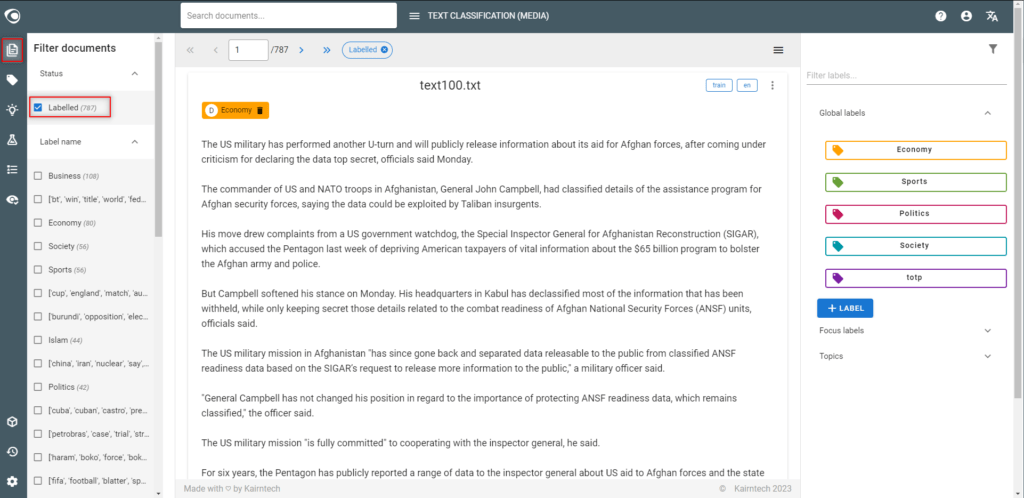
- Go to the Documents view
- Select “Labelled” in the “Status“ filter to access the dataset
- The dataset must be as accurate as possible: without false or missing categories and no inconsistencies between categories

Step 7: Split the dataset
- Why spliting dataset?
- To make sure we will use the same training and test sets to compare different model experiments
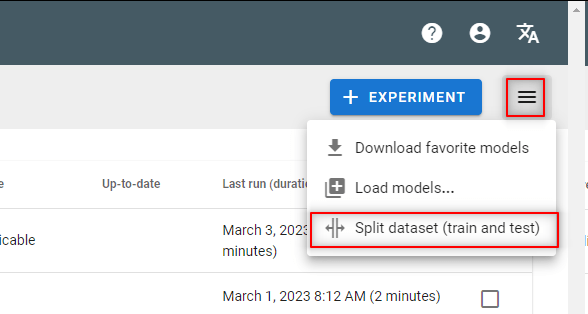
- Go to the Model experiments view
- Split the dataset by generating train/test metadata on the dataset
- Note:
- If new annotations are added to the dataset, the split will be automatically updated when launching a new experiment
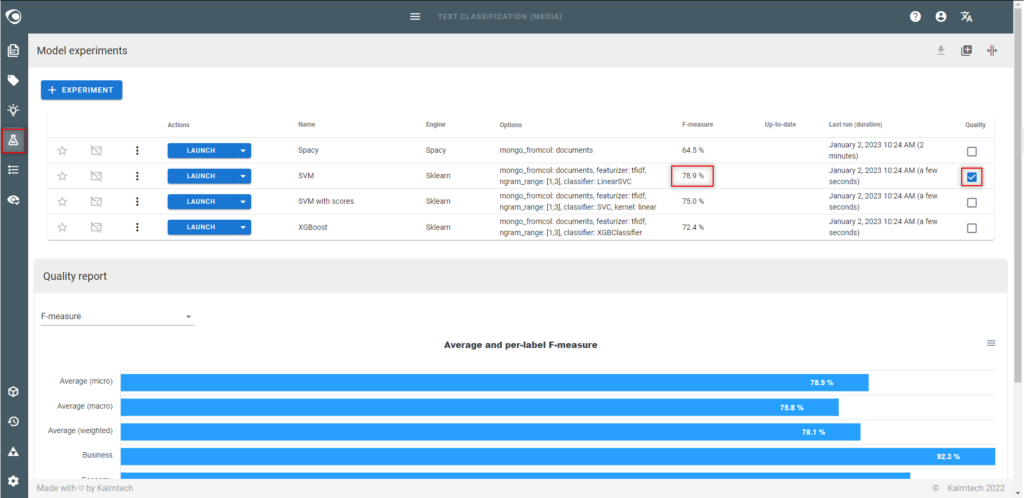
Step 8: Train models
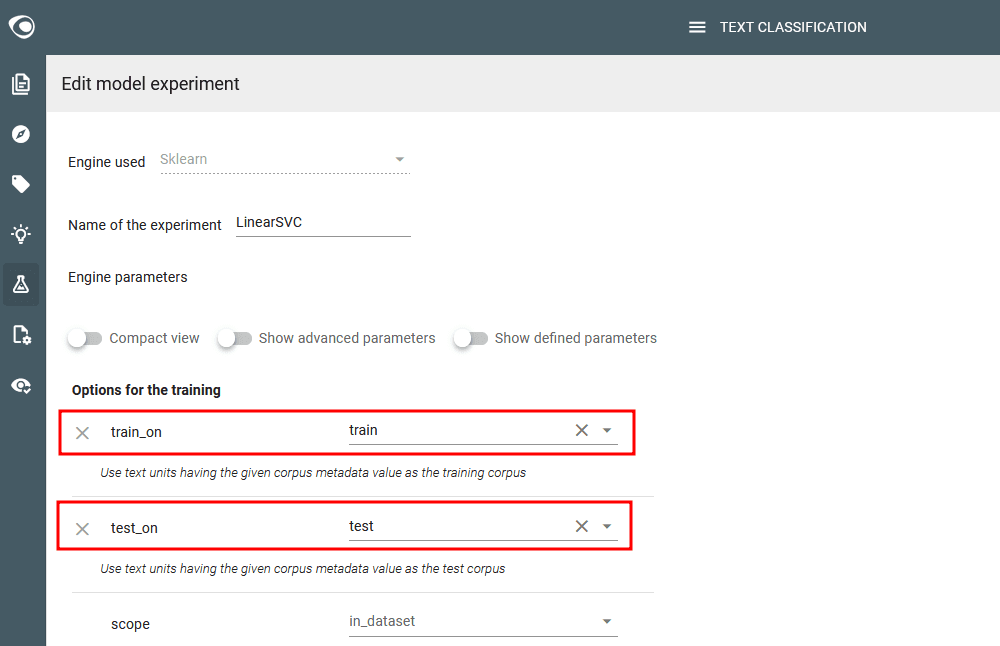
- Go to the Model Experiments view
- Edit each predefined experiment, check the training options to use train & test metatada on “train_on” and “test_on” parameters
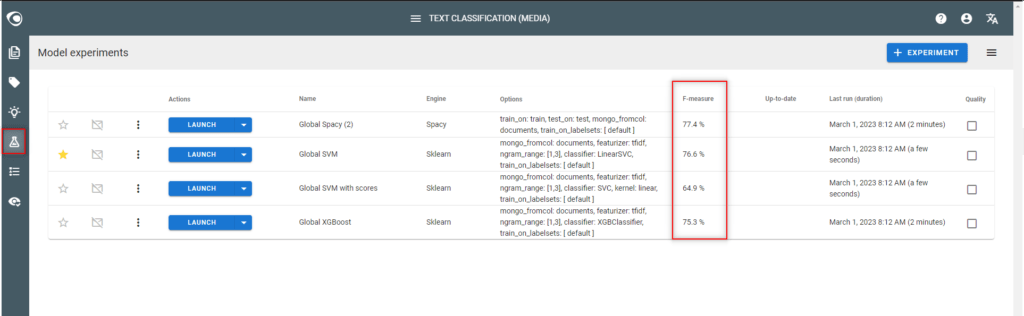
- Launch the predefined experiments
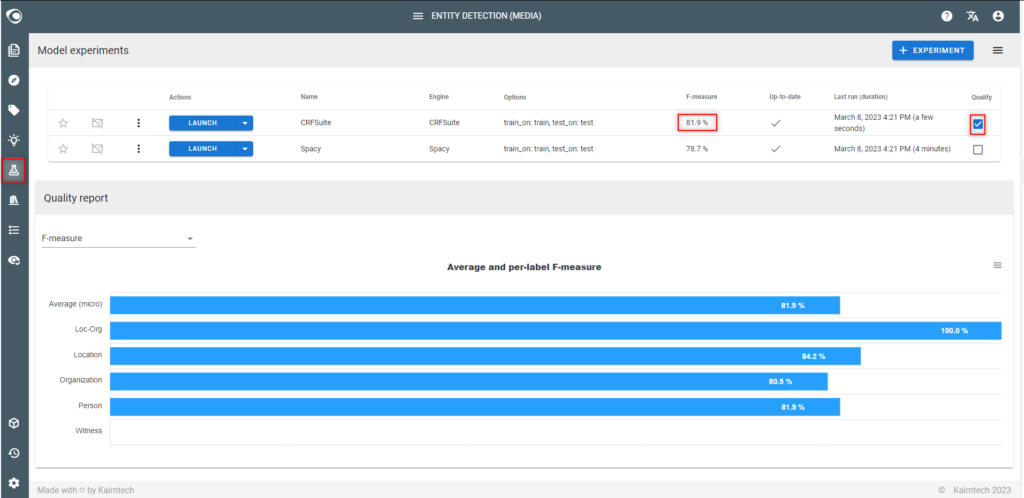
- Check the quality (F-measure) of each experiment and identify the best model
- Note:
- If the F-measure is below 60% quality, enrich and improve the dataset by iteration (see next steps below)
- Do not create new experiments to test different algorithms if the F-measure is below 60%, it is useless at this stage
Step 9: Iterate steps 4-5-6 above to achieve 60% accuracy
- In the Model experiments view
- Identify labels with low quality by ticking the quality box
- Enrich the dataset on these labels either:
- with new manually annotated segments (see above: 4 – Annotate text)
- or by using Suggestions (see above: 5 – Use the suggestion engine)
- In the Model experiments view
- Run the experiment again and see if the accuracy of the model has improved for each label
- Iterate… until achieving at least a 60% accuracy for each label
Step 10: Annotate the dataset automatically
- Why annotating the dataset?
- To test the dataset and model quality
- To detect possible discrepancies
- It is only useful if model accuracy is above 60%
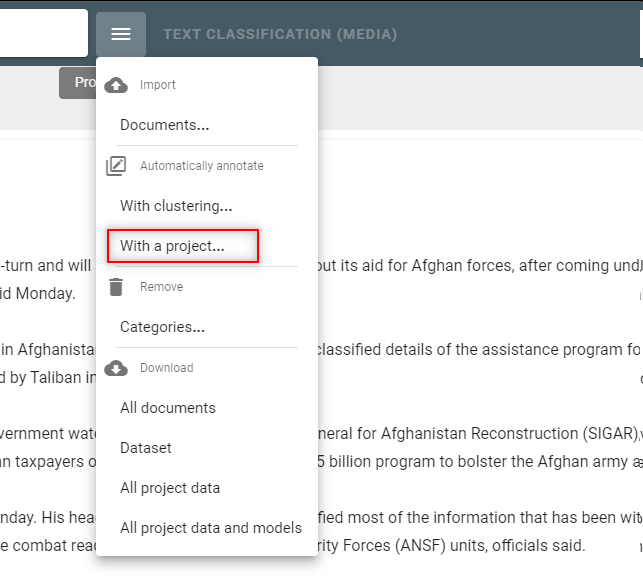
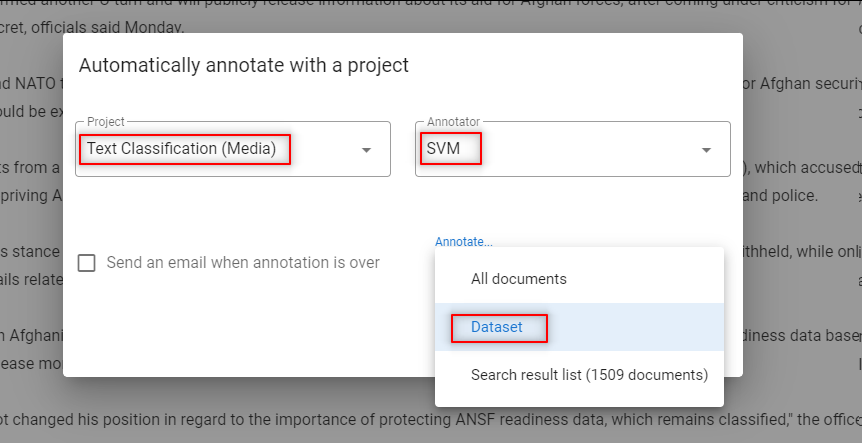
- Go to the Documents view
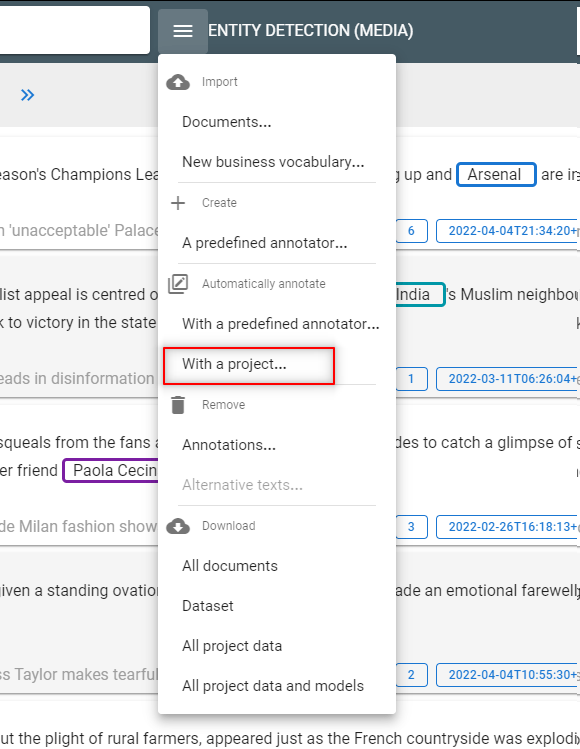
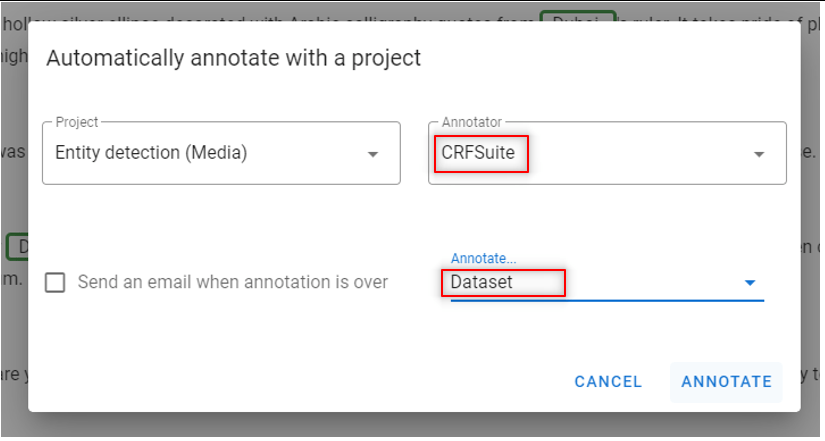
- Run an automatic annotation of the dataset with the model
Step 11: Identify discrepancies
- Go to the Documents view
- Open the filter “Agreement: automatic-other”
- Select “Disagreement“
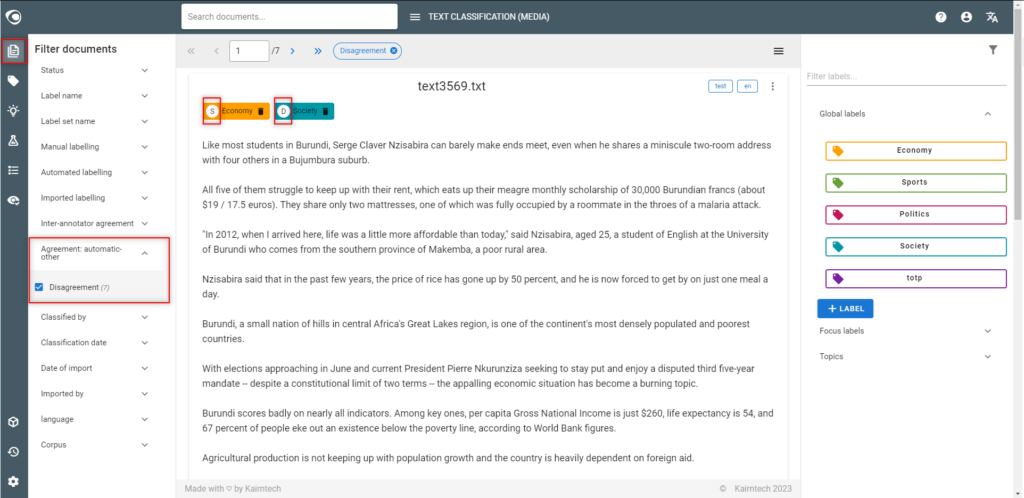
- Check the origin of the annotation with the letter or the tooltip on the chips
- If the model is right after all, correct the dataset manually.
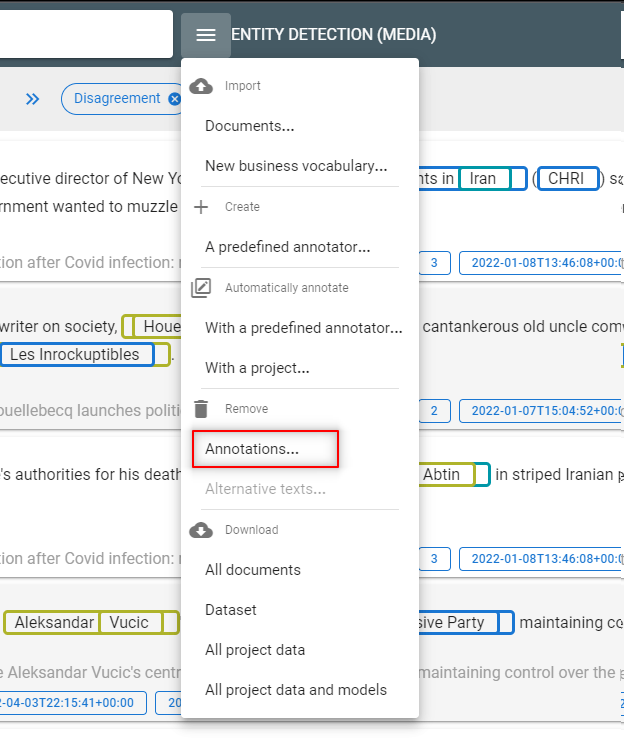
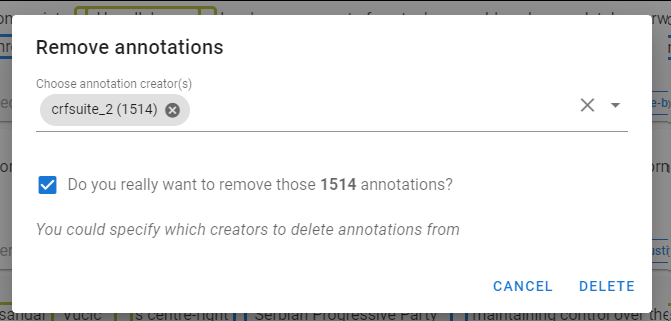
- When corrections are made, remove the automatic annotations from the model.
- Re-train the model. You will improve the model’s precision.
Step 12: Train the final model
- Why selecting a final model?
- To compare different algorithms to judge their accuracy
- Probably neither the suggestion model nor the pre-packaged experiments result in the best model. In this case, it is necessary to experiment to select the final model .
- Go to the Model experiments view
- Create additional model experiments, launch models and compare the quality (F-measure)
- Note:
- The goal is to achieve an accuracy between 80% and 95% (F-measure)
- Don’t expect to achieve a 100% accuracy… but you might reach this in some simple cases
- Performance might be as important as accuracy, in which case it is not necessarily the highest quality model that is selected as the final model
Entity detection
Step 1: Initiate the project
- Create the project (type=Entity detection)
- Upload documents.
- If documents are short (a few sentences), it is not necessary to create segments.
- Otherwise, use the default segmentation engine to start with.
- Inspect documents and segments
- Go to the Documents view and read several documents to see what they look like, how they differ
- Go to the Segments view and check if segmentation is good and appropriate. A different and better segmentation may be necessary. In this case use either an off-the-shelf segmenter or build a custom segmentation pipeline.
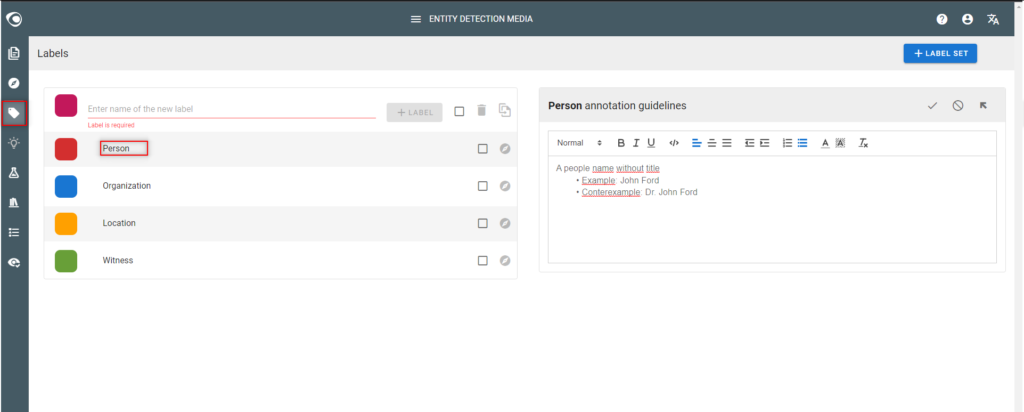
Step 2: Define labels
- What is a label?
- A label describes a concept (or an entity type)
- Creating a label means that text will be annotated with that label (think about positive and negative examples of the concept to be added as annotation guidelines).
- Go to the Labels view
- Create labels
- It is possible to create a label to obtain better results even if the label is not used to create a model
- Write annotation guidelines for each label (recommended)
Step 3: Pre-annotate documents (optional)
- Why using automatic pre-annotation?
- Pre-annotation by using an off-the-shelf model or NLP pipeline can save time in creating a dataset
- Pre-annotate documents
- At least some of the labels of the model/NLP pipeline that is used to pre-annotate should perfectly match the labels of the project
- Pre-annotate a small number of documents (say 20 to 50) to start with, because all annotations need to be reviewed to create and optimize the dataset
- Please note:
- The dataset consists of all annotated (labelled) segments
- Useless labels and associated annotations can be deleted by using the Labels view
- When creating a new labels, all segments that are already annotated need to be reviewed
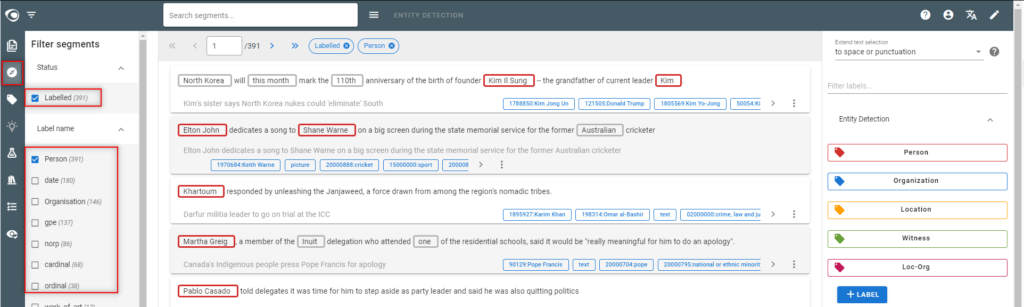
Step 4: Annotate text
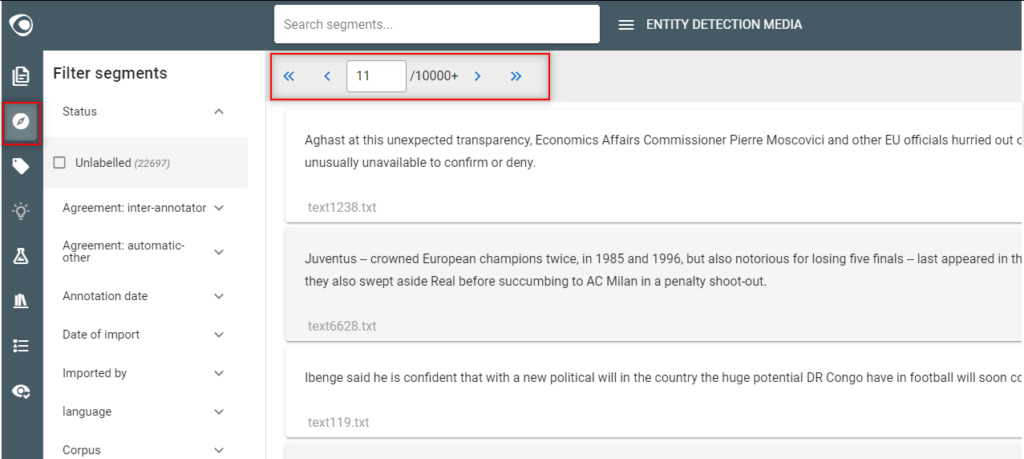
- Go to the Segments view
- Annotate text
- At least 10 to 15 annotations per label, following the annotation guidelines
- Continue even after the first appearance of the blue “pop up” appears announcing available suggestions
- If context is lacking
- Switch to the Documents view
- Possibly reconsider the segmentation of the document by using an off-the-shelf segmenter or by creating a custom segmentation pipeline
- Notes:
- Review carefully the annotated segments to avoid false, inconsistent or missing annotations
- It is better to have few annotations without errors and inconsistencies than many annotations with possible errors and inconsistencies
- Segments must be annotated consistently
- If an entity is not annotated when it should be, it will be considered as a counter example and confuse the algorithm and consequently lower its quality
- The dataset consists of all annotated (labelled) segments

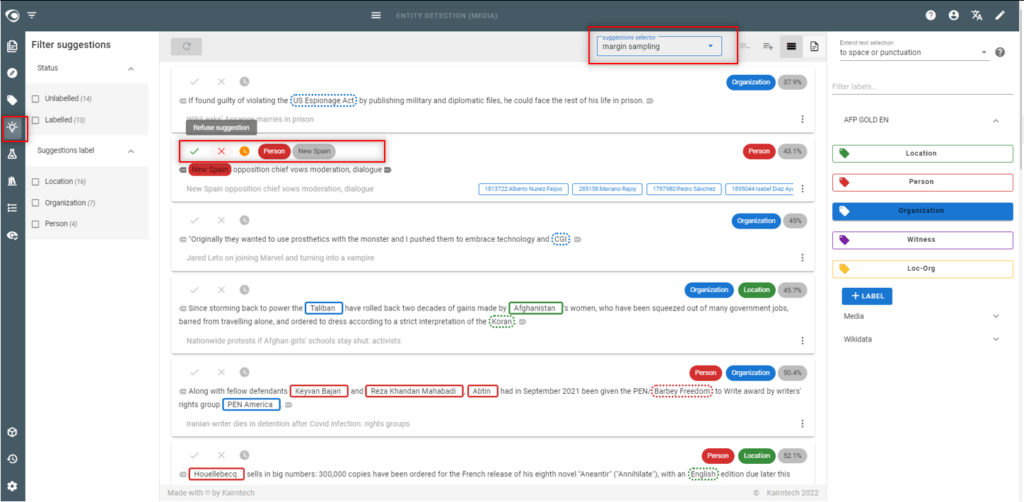
Step 5: Use the suggestion engine
- Why using the suggestion engine?
- To speed up dataset creation
- To quickly assess the machine’s ability to learn
- Go to the Suggestions view
- Accept/correct/reject the suggested annotations then validate the segment
- Each validated segment will be added to the dataset together with its annotations
- Manage suggestions
- Sort suggestions according to their confidence level score
- Use “high confidence” score to assess the machine’s ability to learn
- Use the “margin sampling” or “low confidence” score to handle the segments where the machine has the most difficulty
- Filter the suggestions on the labels you want to work on
- If the context of the segment is insufficient to validate a suggestion, increase the context or click on the title to access the document (possibly reconsider the segmentation of documents)
- If you reject all the suggestions and finally validate the segment, it will be added to the dataset, and thus be considered as a counter example. It can be very effective to add counter examples to a dataset to improve the accuracy of the final model.
- Sort suggestions according to their confidence level score
- Note:
- The suggestion engine is updated after a few validations
- The suggestion engine is based on a machine learning algorithm with a fast training time (but which will not necessarily provide the best results)
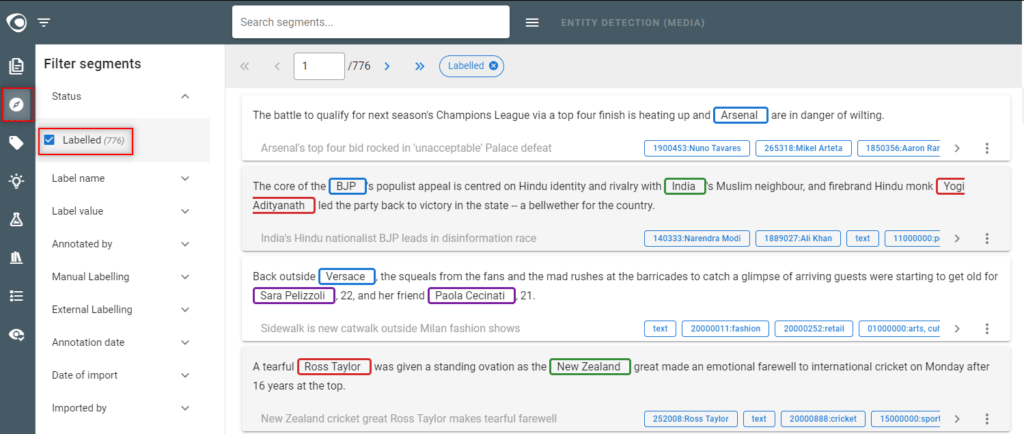
Step 6: Review the Dataset
- Why reviewing the dataset?
- Dataset quality is essential to create the best possible model
- Go to the Labels view
- Make sure the annotations are evenly distributed over the labels… as much as possible

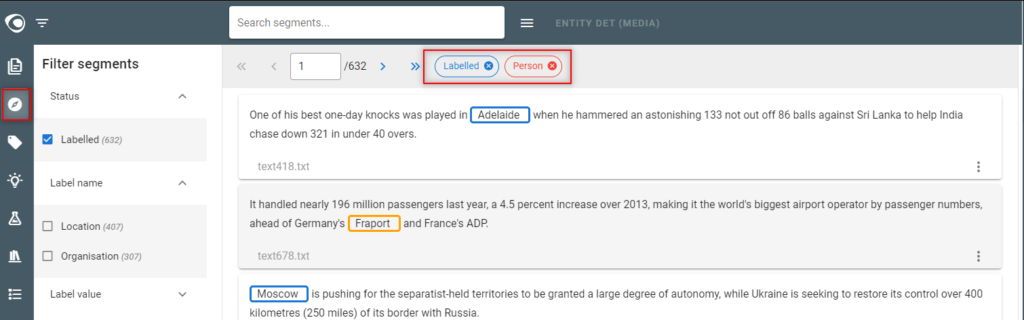
- Go to the Segments view
- Filter the segments on Status=”Labelled“
- You see the dataset which consists of all annotated (labelled) segments
- In the Segments view
- Select the label within the filter “Label name“
- Then detect possible false annotations on this label

- In the Segments view
- Apply the “exclusive” mode on the filter displayed at the top by selecting the red icon next the label.
- Then detect possible missing annotations on this label
- Note:
- The dataset must be as accurate as possible: without false or missing annotations, and without inconsistencies!
Step 7: Split the dataset
- Why splitting a dataset?
- To make sure to use the same training and test sets to compare different model experiments
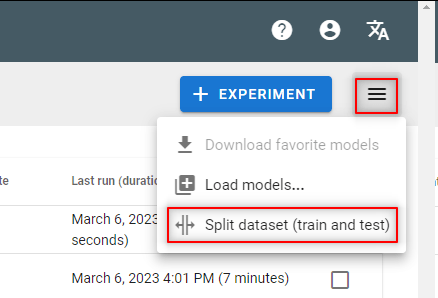
- Go to the Model experiments view
- Split the dataset by generating train/test metadata on the dataset
- Note
- If you add new annotations to the dataset, the split will be automatically updated when launching a new experiment
Step 8: Train first models
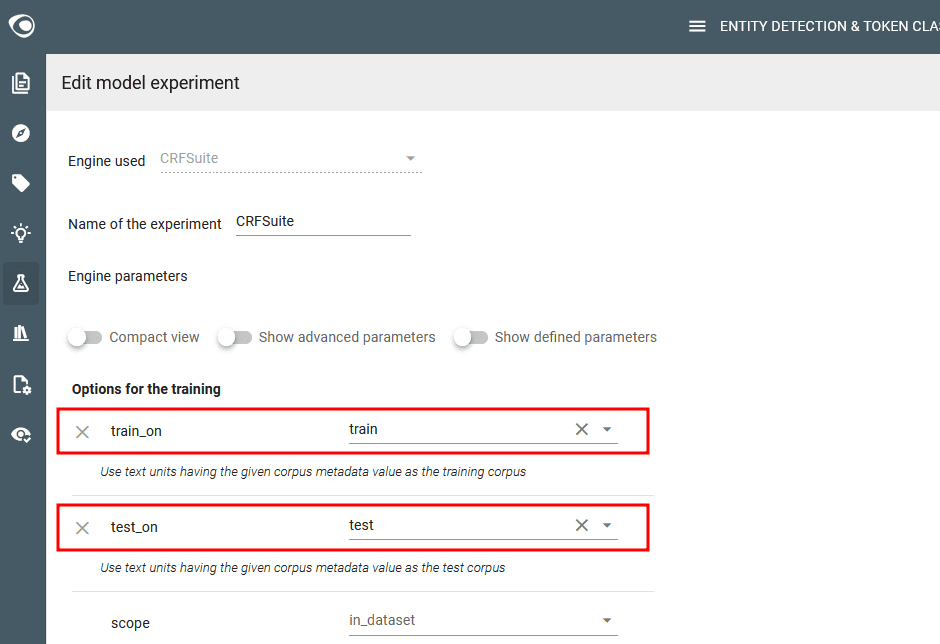
- Go to the Model experiments view
- Edit each predefined experiment, check the training options to use train & test metatada on “train_on” and “test_on” parameters
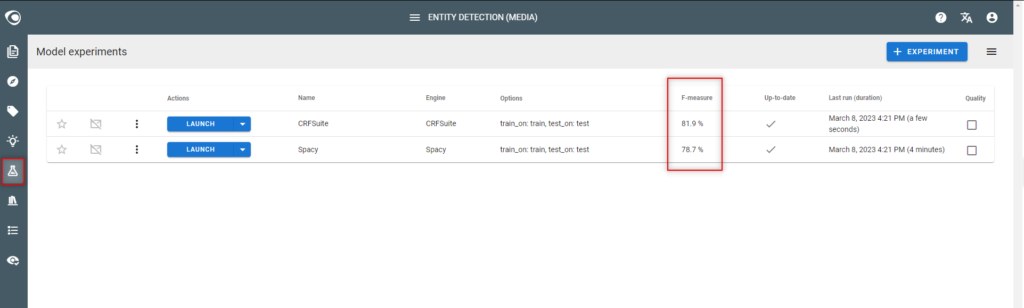
- Launch the predefined model experiments
- Check the quality (F-measure) of each experiment and identify the best model
- Notes:
- If the F-measure is below 60% quality, enrich & improve the dataset by iteration (see next steps below)
- Do not create new experiments to test different algorithms if the F-measure is below 60%, it is useless at this stage
Step 9: Iterate steps 4-5-6 above to achieve 60% accuracy
- In the Model experiments view
- Identify the labels having a low quality in the quality report
- Enrich the dataset on these labels either:
- with new manually annotated segments (see above 4 – Annotate text)
- or using the Suggestions view (see above 5 – Use the suggestion engine)
- In the Model experiments view
- Run the experiment again and see if the accuracy of the model has improved for each label
- Iterate… until achieving a 60% accuracy per label
Step 10: Annotate the dataset automatically
- Why annotating the dataset?
- To test the model & dataset quality
- To detect possible discrepancies
- Go to the Documents view
- Run an automatic annotation of the dataset with the model
- Note
- This is only useful if the model accuracy is above 60%
Step 11: Identify discrepancies
- Go to the Segments view
- Select “Disagreement” in the filter “Agreement: automatic-other“
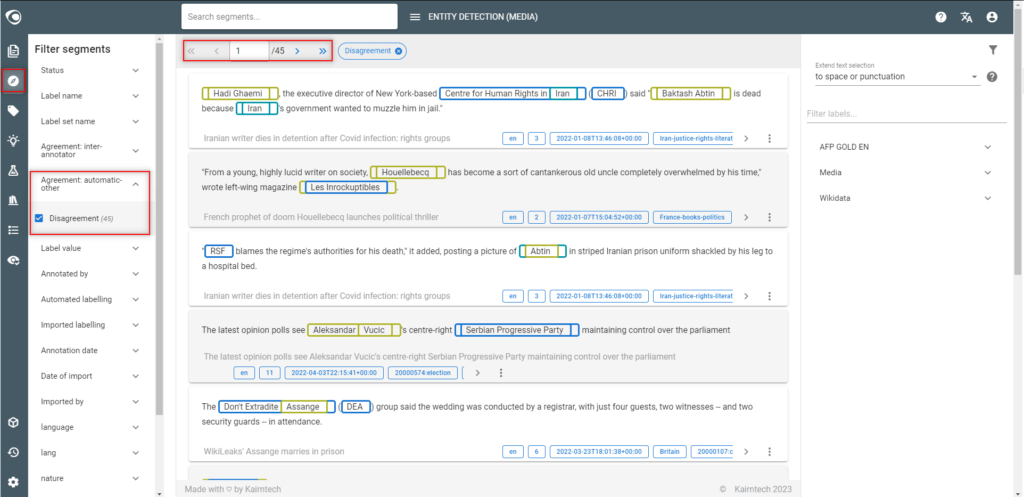
- Look at each segment to understand the reason why there are discrepancies:
- If there is a mistake, delete the annotation
- It there is a pattern with no or very few examples in the dataset use the similarity search on the segment and enrich the dataset.
- If the quality of the text is bad (especially with PDF files converted into text), a solution could be to improve the quality of the converter.
- There is no real explanation
- When you have finished the corrections, remove the automatic annotations from the model.
Step 12: Train the final model
- Why creating a final model?
- You may want to compare different algorithms in terms of accuracy
- Probably neither the suggestion model nor the pre-packaged experiments the best model. In this case, it is necessary to experiment to find the best final model.
- Go to the Model experiments view
- Create new experiments and launch them to test different algorithms
- Compare quality (F-measure) between models
- Note:
- The goal is to achieve an accuracy between 80% and 95% (F-measure)
- Don’t expect to achieve 100% accuracy… but you might achieve this in some simple cases
- Performance could be as important as accuracy, in which case you might not select the best model in terms of quality